
BOMBANANA Switch Module Guide: Track Every State
Solve the BOMBANANA switch module by recording the starting state, confirming the rule, flipping one switch at a time, and checking every change.
FAQ
What is the safest way to solve the BOMBANANA! switch module?
Are the switch module answer tables permanent?
The short answer
The BOMBANANA! switch module is solved by tracking state, not by flipping quickly. Read every switch in a fixed order, decide whether the rule asks for a sequence or a final arrangement, then make one confirmed change at a time. If the team loses the current board, stop and rebuild the callout from the last state everyone confirmed.
The module belongs to the wider manual workflow. The player at the bomb needs a physical switch position, the manual reader needs the complete starting information, and the speaking bridge needs a stable way to carry the final action back. One missing position can make a correct rule produce the wrong input.
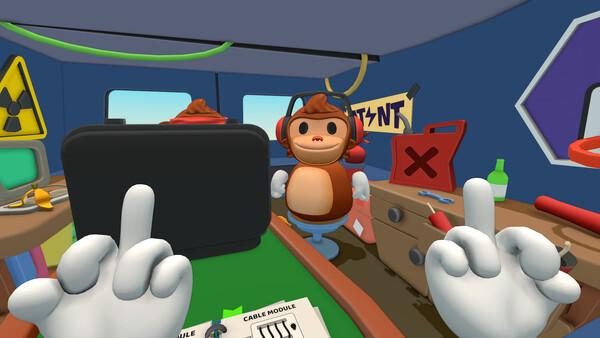
The image is a visual reference for the Switch Module setting. It does not prove a universal switch answer, so use it to understand the setting and keep the live board as the current state.
Record the starting board
Before anyone flips a switch, count the controls and read their positions in a fixed order. Use panel left to right, or use the bomb handler’s left to right, and say which perspective the team chose. A phrase such as “panel perspective, top row left to right” gives the manual reader a reference that can survive a busy voice channel.
Read every position even when one switch looks obvious. Say up or down for each control, and separate rows if the panel has more than one row. Add any visible number, light, label, or confirm control that the current manual rule requires.
The first state is the team’s baseline. Without it, a later call can describe the same switch with a different position or assume that a previous action succeeded. The starting board also lets the team recover when a player misses a gesture or the bomb view moves before the next input.
Decide what the rule asks for
The switch module can feel like a simple on and off puzzle, yet it can require two different kinds of work. Some situations ask the team to follow an ordered sequence, while others ask for a target end state. The manual reader must identify which kind of answer applies before sending a switch instruction.
Do not infer the next flip from a familiar layout. A configuration seen in an older Demo clip may not match the current release, and a changed number or light can send the manual reader to another branch. Treat a screenshot as practice material unless the live manual and board confirm the same state.
Keep the final confirm or Enter action separate from the switch sequence. The team should know that the last toggle has been checked before anyone commits the panel. Combining the last flip and the confirm input into one vague instruction makes it hard to diagnose which action caused a failure.
Pass the information through the roles
The Blind Monkey can interact with the bomb and may be the player who reports tactile positions or performs the final flips. The Mute Monkey is associated with the manual and turns the reported state into a rule-based action. The Deaf Monkey can see the board and speak, so this role can read visible switch positions and translate the Mute Monkey’s gestures into a spoken instruction.
The exact communication path can change with the module state, yet the team still needs one owner for each part. Let one player own the full state report, one player own the manual branch, and one player repeat the physical action. When all three players describe the board at once, the state becomes impossible to audit.
Use a short packet for each move. Name the switch module, repeat the current ordered state, give one switch position to change, and wait for confirmation. After the flip, read the new state before asking for the next action.
Flip one switch at a time
Multiple unverified flips are the fastest way to lose the board. The handler should change only the switch named by the confirmed instruction, then pause long enough for the state tracker to read what changed. The manual reader can then compare the new state with the intended sequence or target arrangement.
A useful team rhythm has four parts. The tracker reports the current state, the manual reader chooses the next action, the bridge repeats that action, and the handler flips one control. The tracker then confirms the new state and starts the next cycle only when the board still matches the rule.
If the module changes after a flip, the previous answer is stale. Describe the changed panel again instead of continuing with the old sequence. If nobody can say which state is current, return to the last confirmed board and rebuild from there.
What remains To be confirmed
The Demo guide includes example configurations that combine digit strings, light sequences, switch positions, and target positions. Those examples are useful for understanding which fields a rule may use, yet they are not enough to establish a permanent answer table for every release build. The exact switch mapping for a live board is To be confirmed unless the current in-game manual verifies it.
The same caution applies to claims about a fixed campaign level, a universal number of switches, or one guaranteed gesture for every action. The official launch announcement confirms new puzzle modules and Custom settings, but it does not publish a complete public Switch Module solution sheet. Keep the module overview open for the communication pattern and use the live manual for the answer.
Practice the state without panic
Campaign is a good place to learn when the team is new because it gives the group a structured progression. Custom is useful when the team wants to practice a selected module or control the bomb difficulty, timer, environmental hazards, and allowed mistakes. The game modes guide explains those choices.
Before a practice run, test the chosen perspective and one up or down signal. During the run, appoint a state tracker and give that player permission to call stop when a position is missing. After the run, change one convention at a time so the next attempt tests a real improvement.
For the complete manual relay, read BOMBANANA! manual. When a wire, math, or direction panel appears beside the switches, use the wires guide, math module guide, or direction module guide and keep every module’s state separate.
Related Articles
guides
BOMBANANA Guide for First Runs, Roles, and Bomb Tips
Use this BOMBANANA guide to prepare three players, understand the Blind, Deaf, and Mute Monkey roles, choose Campaign, and build safe callouts.
guides
BOMBANANA Blind Deaf Mute Roles Explained
Learn the BOMBANANA blind deaf mute role split, what each player can access, and how three teammates pass information safely before acting on a live bomb.
communication
BOMBANANA! Communication Guide for Three-Player Co-op
Build clear BOMBANANA! callouts with voice, text, and gestures so the Blind, Deaf, and Mute Monkey roles can combine partial information under pressure.
Was this helpful?
Thanks for the feedback!